How to Set-up Spring Boot Swagger-enabled REST Projects
Learn more about using Spring Boot Swagger-enabled REST projects in the below tutorial.
In this tutorial, we are going to try out a Spring Boot Swagger-enabled REST project and explore how the validation constraints can be utilized automatically for enriching Swagger models.
We are going to refer to https://www.baeldung.com/swagger-2-documentation-for-spring-rest-api and https://spring.io/guides/gs/rest-service/ as starting points.
PREREQUISITES:
Java 8.x
Maven 3.x
STEPS
Start by creating a Maven JAR project. Below, you will see the initial pom.xml:
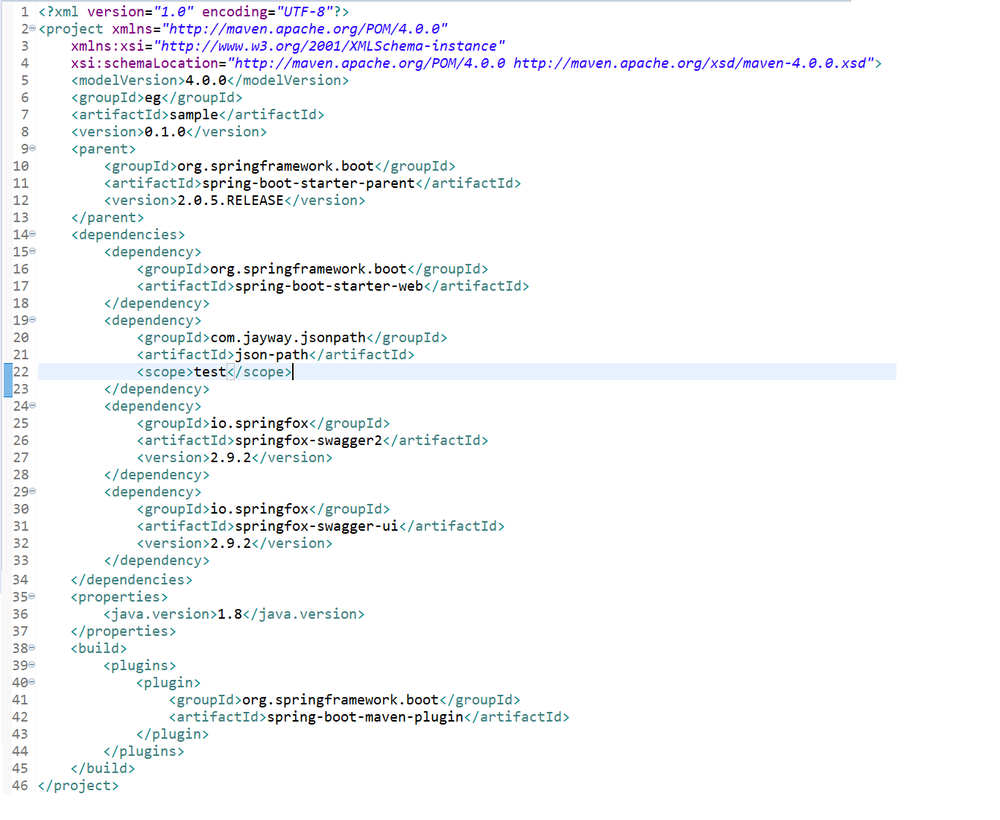
This is the initial POM.xml.
Now, let's create a small Java bean class.

This is an example Java bean.
Now, let's create a controller.

Above is a sample REST Controller.
Here is an example Swagger configuration:
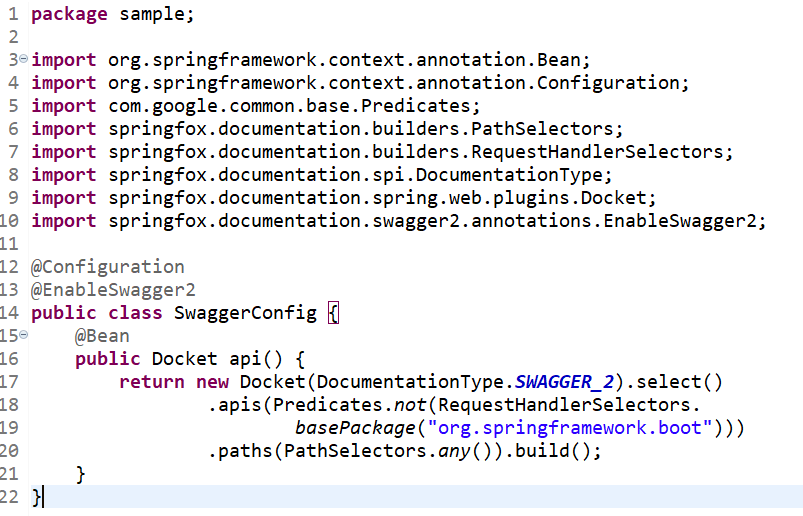
SwaggerConfig
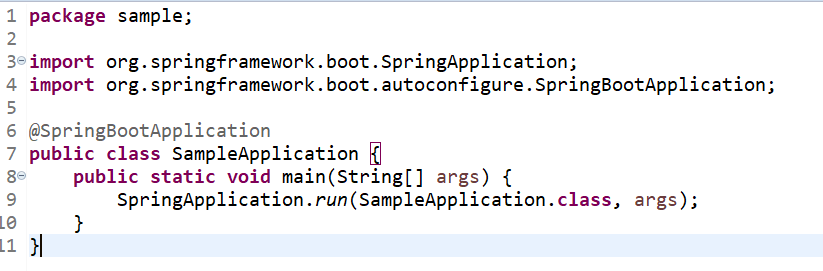
The Spring Boot application class is shown below:
At this stage, this is what the sample project looks like in Eclipse IDE:

Above are the project contents.
Next, execute the “mvn clean package” from command prompt or terminal. Then, execute “java -jar target\sample-0.1.0.jar.”
You can also launch the application by running the SampleApplication.java class from your IDE.
Now, let's visit the Swagger UI — http://localhost:8080/swagger-ui.html:

Press “Try it out” button. Then, press the execute button. The validation errors are reported below.
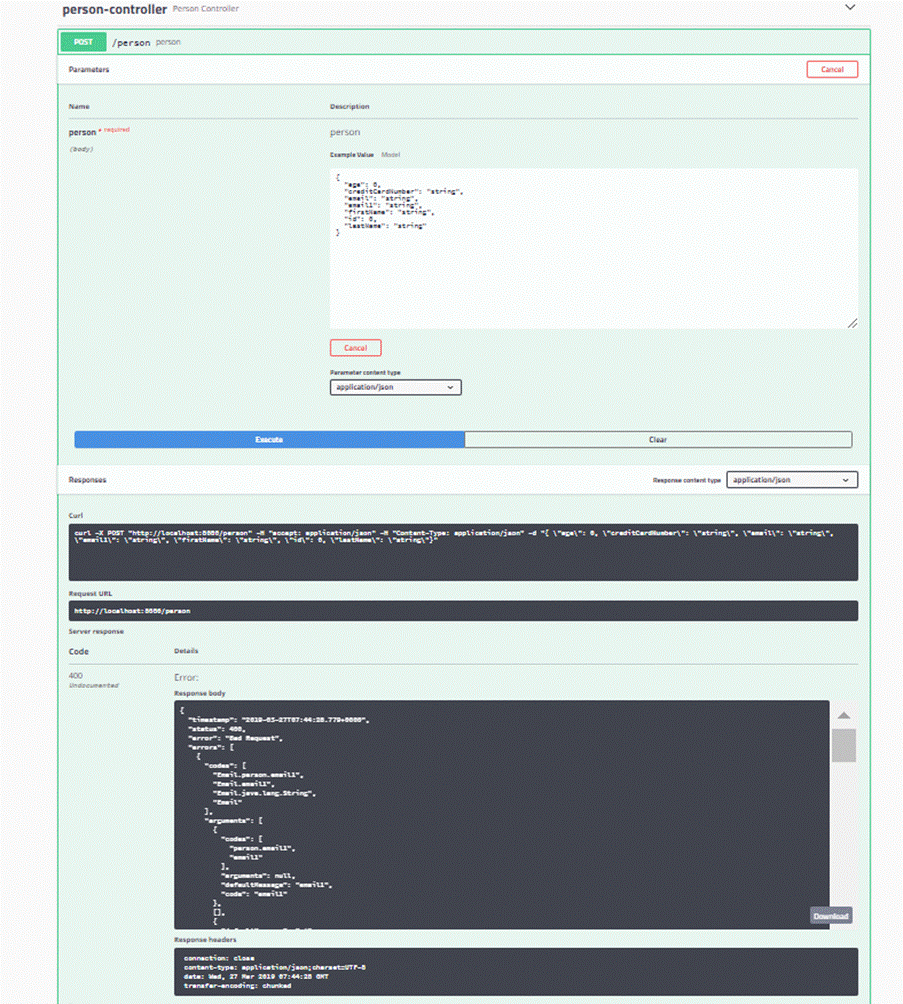
Showing below the details for more readability.

Note: For now, try with Parameter content Type of “application/json.”
If you are trying the application/XML parameter content type, adjust manually the tag to .
While this is great, what about the validation constraints? Is it possible to bring them out automatically in the Swagger specifications of this sample project?
Now, add the spring-swagger-simplified dependency into the pom.xml:

Then, add this dependency and make one additional change.

Above is the updated main application class
Note: the change is in line 7 and line 9.
Note: in case you used a different package name, please replace "sample” with the package name used just above in the @ComponentScan.
Stop and relaunch the application.
Revisit the Swagger UI — http://localhost:8080/swagger-ui.html
The difference is in how the model is reported.

Also note that if you are trying the application/XML parameter content type, now there is no need to adjust manually the Person tag to person. These are some of the additional benefits offered by above spring-swagger-simplified maven jar.
This was only a brief introduction to the capabilities of this jar. For a more complete understanding of the various features, please try out this more detailed example project with many more features — https://bitbucket.org/tek-nik/simplified-swagger-examples/.
TROUBLESHOOTING TIPS
Ensure prerequisites
If using the Eclipse IDE, we might need to do a Maven update on the project after creating all the files.
In the SampleApplication main class, make sure you have the correct package name in @ComponentScan. Avoid typos in the package name there.
In the Swagger UI, if you are unable to access the “Model” definitions link, it might be because you need to come out of the “try it out “ mode. Click on one or two Cancel buttons that might be visible.
This article has been published at DZone here, go to the article .
Spring-swagger-simplified is a java jar developed, published by the author Raghuramaman Ramaswamy in maven central.
